Robot Config
In order to access hardware, the Qualcomm framework provides an object called the hardwareMap, which is something like a TypeMap, except each type also has its own map between String and the hardware you want.
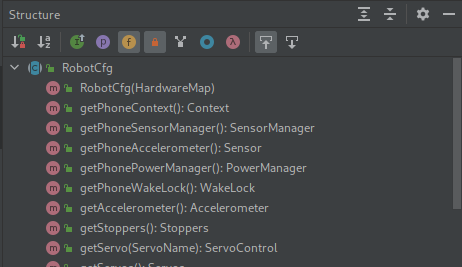
ElectronVolts takes this a step further by making the abstract class RobotCfg, which can be used to preload all of the names out of the hardwareMap and let you get it directly.

(a side note: I call it hardware here, but it's really a reference to the hardware. As in, an object which you can use to control the hardware.)
Importantly, Robot Configs decouple the hardware team from the software team. When the hardware team connects a device to the Robot's brain, that change needs to be reflected in the code. If the hardware specification and the software logic are in the same place, it makes it hard for both teams to read and write. With the Robot Config, the hardware team can declare in one place what hardware they are using in their robot, and the software team only has to read from one place to figure out what hardware is being used.
This also means that this section is great for both hardware and software team to understand.
The library is still not magic.
If you write code that isn't readable, then putting it all in one place won't necessarily make it better.
Code
Start with a Robot Config like so:
MyRobotCfg.java

import com.qualcomm.robotcore.hardware.HardwareMap;
import ftc.evlib.hardware.config.RobotCfg;

public class MyRobotCfg extends RobotCfg {
    public MyRobotCfg(HardwareMap hardwareMap) {
        super(hardwareMap);
    }

    @Override
    public void start() {}

    @Override
    public void act() {}

    @Override
    public void stop() {}
}
Right now, this config represents an empty bot. It has one brain, one phone, and that's it. This is already pretty powerful – without any custom logic, you have direct access to all the phone's sensors. This is sufficient for an abstract example, but what if we want to add motors to a bot?
Let's start by adding a simple DC motor to a bot, which on the robot core has been programmed to be called "bruh":
public class MyRobotCfg extends RobotCfg {
    public final DcMotor myMotor;

    public MyRobotCfg(HardwareMap hardwareMap) {
        super(hardwareMap);
        myMotor = hardwareMap.get(DcMotorEx.class, "bruh");
    }
}
Some code is not shown for conciseness.
This also works with the getter pattern, like so:
public class MyRobotCfg extends RobotCfg {
    private final DcMotor myMotor;

    public DcMotor getMyMotor() {
        return myMotor;
    }

    public MyRobotCfg(HardwareMap hardwareMap) {
        super(hardwareMap);
        myMotor = hardwareMap.get(DcMotorEx.class, "bruh");
    }
}
Now, when the software team needs the motor, and has a MyRobotCfg, they can call myRobotCfg.getMyMotor() to receive and move the motor.
The complete code should look like this:
import com.qualcomm.robotcore.hardware.DcMotor;
import com.qualcomm.robotcore.hardware.DcMotorEx;
import com.qualcomm.robotcore.hardware.HardwareMap;
import ftc.evlib.hardware.config.RobotCfg;

public class MyRobotCfg extends RobotCfg {
    private final DcMotor myMotor;

    public DcMotor getMyMotor() {
        return myMotor;
    }

    public MyRobotCfg(HardwareMap hardwareMap) {
        super(hardwareMap);
        myMotor = hardwareMap.get(DcMotorEx.class, "bruh");
    }

    @Override
    public void start() {}

    @Override
    public void act() {}

    @Override
    public void stop() {}
}
This is all the code you need to move to the next step. If there are some other types of hardware you'd like to add, find them in the FTC javadoc, or see some more types we've made in the Hardware section.