Note: Whenever *nix is used here, it refers to operating systems which are somehow based off Unix, like Linux, BSD, and such (excluding Apple operating systems).
Development Environment
Java
This step can usually be ignored, since almost every computer has java preinstalled.
To start, you must first have Java installed. Java 8 or 11 should work, and if you can get Java 16, even better. Windows or MacOS users should go to the Oracle site and follow the installation instructions for your OS. *nix users should follow the distribution-dependent instructions for installing java.
Android Studio
Android Studio is an "IDE", or Integrated Development Environment. It serves the same purpose as a text editor, but has "Integrations", such as code formatting or version control. The most important integration for FTC is donwloading programs onto Android devices.
To install Android Studio for Windows or MacOS computers, go to the Android Studio site and follow the installation instructions for your OS. *nix users should follow the distribution-dependent instructions for installing Android Studio.
You should definitely spend some time customizing and familiarizing yourself with Android Studio.
Project Setup
FTC Framework
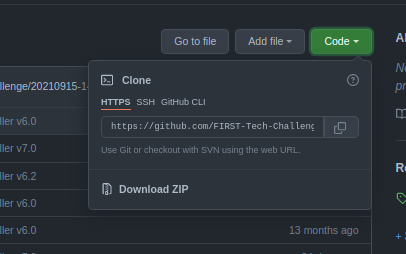
Your project is based off the Qualcomm framework. To begin a new FTC project, copy all of the code from the FTC repository into your own project. You can do this by clicking the "Code" button, then clicking "Download ZIP", as shown.

It is better, though, to use Version Control to do this. If you are familiar with github and have a github account, you can do this by "forking" the FTC repository and using that instead.
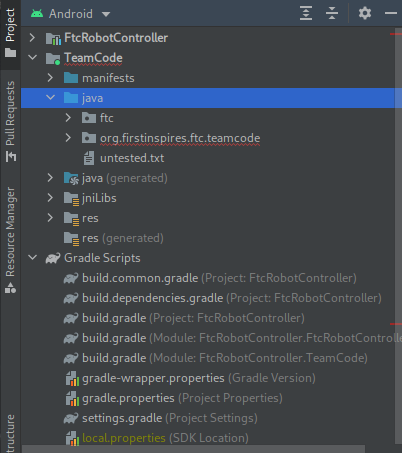
You can then start writing your code in the TeamCode/src/main/java directory. In Android Studio, you can open this directory by switching from Project to Android view as shown, then navigating to TeamCode/java.

Evlib
The latest version of Evlib is not available in its own repository. You can find a copy of it on the ElectronVolts github page, on the evlib-release branch. Copy all the files in the ./Evlib directory to the same location in your project, then update the settings.gradle file like so:
  include ':FtcRobotController'
  include ':TeamCode'
+ include ':Evlib'
We are currently working on an alternative method to install evlib using the same method as before. Check the original page for updates.